
Methods Hospitals Use to Clean and Sterilize Surgical Instruments
July 3, 2024 2024-08-24 7:14Methods Hospitals Use to Clean and Sterilize Surgical Instruments
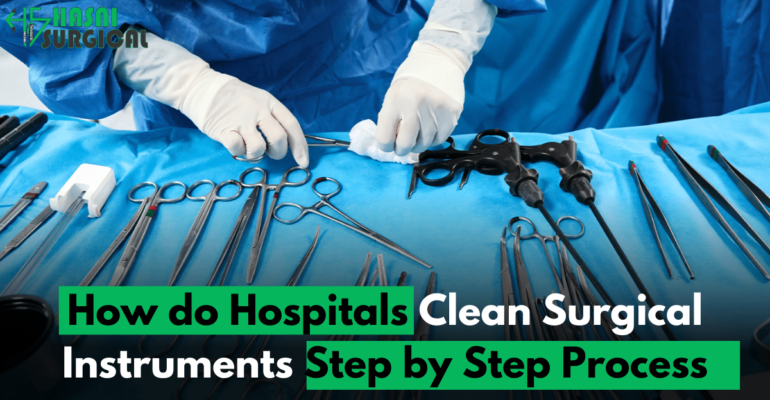
Methods Hospitals Use to Clean and Sterilize Surgical Instruments
Cleaning hospital surgical instruments is essential to prevent infections and ensure patient safety. Surgical instruments come into direct contact with body tissues and fluids, making them potential carriers of harmful bacteria, viruses, and other pathogens. If instruments are not thoroughly cleaned and sterilized, these contaminants can be transferred from one patient to another, leading to serious infections and complications. Proper cleaning removes organic material and debris, allowing the sterilization process to be effective.
Additionally, clean instruments function more reliably, reducing the risk of surgical errors. Therefore, meticulous cleaning and sterilization are crucial to maintaining high standards of hygiene, protecting patient health, and ensuring successful surgical outcomes.
Also read: Integrating 3D Printing in Dental Instrument Manufacturing
For example, this process is akin to how we clean our kitchen knives at home: just as we wouldn’t use a knife that was previously used to cut raw chicken to then cut vegetables without thoroughly cleaning it first, surgeons cannot safely use contaminated instruments. Meticulous cleaning and sterilization are crucial to maintaining high standards of hygiene, protecting patient health, and ensuring successful surgical outcomes.
Essential elements or items required for cleaning hospital surgical instruments
| Items Required | Their Pouropes |
|---|---|
| Cleaning Solutions like Detergents | Specialized cleaning solutions that break down organic material on instruments. |
| Brushes | Used to manually scrub and remove debris from instruments. |
| Ultrasonic Cleaners | Machines that use high-frequency sound waves to clean hard-to-reach areas. |
| Washer-Disinfectors | Equipment that uses water jets, detergents, and heat for thorough cleaning. |
| Sterile Packaging | Materials used to wrap instruments after cleaning to maintain sterility. |
| Sterilization Indicators | Chemical or biological indicators to ensure sterilization process effectiveness. |
| Lubricants | Used to lubricate hinged instruments to prevent corrosion and ensure smooth operation. |
how do hospitals clean surgical instruments?
Cleaning surgical instruments in hospitals involves a meticulous step-by-step process to ensure patient safety and prevent infections. Beginning with initial cleaning and decontamination immediately after use, instruments undergo manual and automated cleaning methods to remove organic materials. They are then inspected for cleanliness and functionality before undergoing sterilization through various methods like steam or gas.
Finally, instruments are carefully packaged and stored in sterile conditions until they are needed for surgery. This rigorous process guarantees that each instrument meets stringent hygiene standards, safeguarding patient health during medical procedures.
Step 1: Initial Cleaning and Decontamination

Immediately after surgery, surgical instruments are wiped or rinsed to remove visible blood, tissue, and other debris. This pre-cleaning step is crucial to prevent the drying of organic material on the instruments, which can make thorough cleaning more difficult. The instruments are then placed in closed containers for safe transportation to the decontamination area, minimizing the risk of contamination and ensuring staff safety. In the decontamination area, technicians manually clean the instruments using brushes and enzymatic detergents, paying special attention to hinges and lumens.
Step 2. Automated Cleaning
Once the instruments have been manually cleaned, they are placed in ultrasonic cleaners. These machines use high-frequency sound waves to create tiny bubbles in a cleaning solution, which dislodge debris from hard-to-reach areas. Following ultrasonic cleaning, the instruments are loaded into washer-disinfectors. These machines use high-pressure water jets, detergents, and heat to thoroughly clean and disinfect the instruments, ensuring they are free from any remaining contaminants.
Step 3: Inspection and Maintenance

After automated cleaning, each instrument is visually inspected for cleanliness, functionality, and damage. Technicians may use magnifying lenses or microscopes for a more detailed examination. This step is vital to ensure that the instruments are not only clean but also in good working condition. Additionally, hinged instruments are lubricated to ensure smooth operation and prevent corrosion, which helps extend their lifespan.
Step 4: Sterilization
Clean instruments are then wrapped in sterile packaging or placed in sterilization trays to maintain sterility until they are needed. Various sterilization methods are used, depending on the type of instrument:
- Steam Sterilization (Autoclaving) is the most common method, using high-pressure saturated steam.
- Ethylene Oxide (ETO) Sterilization: Uses gas to penetrate materials, ideal for heat-sensitive instruments.
- Hydrogen Peroxide Plasma: Uses vaporized hydrogen peroxide at low temperatures.
- Dry Heat Sterilization: Uses high temperatures without moisture, suitable for certain instruments.
Chemical and biological indicators are used during sterilization to verify that the conditions required for sterilization have been met, ensuring the effectiveness of the process.
Step 5: Storage and Handling

After sterilization, instruments are stored in a clean, dry environment to maintain their sterility. They are organized for easy access and to minimize the risk of contamination. Hospital staff are trained in proper handling techniques to ensure that the instruments remain sterile during transportation and use in surgeries. Proper storage and handling are crucial to maintaining the sterility and safety of the instruments until they are needed for a procedure.
Conclusion
The meticulous process of cleaning and sterilizing hospital surgical instruments is vital to maintaining patient safety and preventing infections. Beginning with initial cleaning and decontamination immediately after surgery, instruments undergo thorough manual cleaning using brushes and enzymatic detergents. They then proceed to automated cleaning in ultrasonic cleaners and washer-disinfectors, where high-frequency sound waves and powerful water jets ensure all contaminants are removed.
Following cleaning, each instrument undergoes meticulous inspection to confirm cleanliness and functionality, crucial for safe surgical procedures. Lubrication of hinged instruments ensures smooth operation and longevity. Subsequently, instruments are carefully sterilized using methods such as steam, ethylene oxide, hydrogen peroxide plasma, or dry heat, all monitored by chemical and biological indicators to verify effectiveness.
Once sterilized, instruments are stored in sterile packaging or trays, maintaining their integrity until needed for surgery. Hospital staff are trained in meticulous handling techniques to prevent contamination during transportation and use. This comprehensive process ensures that every surgical instrument meets stringent hygiene standards, safeguarding patient health throughout medical procedures.


Comments (5)
Jeannie
You have brought up a very excellent points, regards for the post.
hasni
thnanks
hasni
thanks
Swen
I was curious if you ever considered changing the page layout of your website?
Its very well written; I love what youve got to say.
But maybe you could a little more in the way of content so people could connect with it better.
Youve got an awful lot of text for only having 1 or
2 images. Maybe you could space it out better?
Also visit my blog post: webpage
hasni
fdfdfdf